
티스토리 뷰
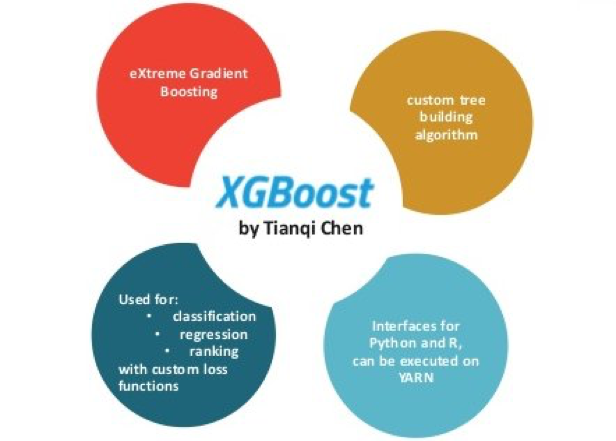
1. XGBoost(eXtreme Gradient Boosting)
- 트리 기반의 앙상블 학습에서 가장 각광받고 있는 알고리즘 중 하나
- 캐글 경연대회에서 상위를 차지한 많은 데이터 과학자가 XGBoost를 이용하면서 널리 알려짐
- GBMd에 기반하고 있지만, GBM의 단점인 느린 수행시간 및 과적합 규제(Regularization) 부재 등의 문제를 해결해서 각광받고 있음
- It was developed by Tianqi Chen and now is part of a wider collection of open-source libraries developed by the Distributed Machine Learning Community (DMLC)
2. XGBoost 장점
- 뛰어난 예측 성능 - 분류와 회귀영역에서 뛰어난 예측 성능 발휘
- GBM 대비 빠른 수행시간
- 과적합 규제(Regularization) - 표준 GBM 경우 과적합 규제기능이 없으나 XGBoost는 자체에 과적압 규제 기능으로 좀다 강한 내구성 지님
- Tree pruning(나무 가지치기)
- 자체 내장된 교차 검증
- 결손값 자체 처리
- Early Stopping 기능이 있음
# Why use XGBoost?
- As we already mentioned, the key features of this library rely on model performance and execution speed.
- A clear benchmark shows how XGBoost outperforms several other well-known implementations of gradient tree boosting.

3. XGBoost How does it work?
"Now, gradient boosting also comprises an ensemble method that sequentially adds predictors and corrects previous models. However, instead of assigning different weights to the classifiers after every iteration, this method fits the new model to new residuals of the previous prediction and then minimizes the loss when adding the latest prediction. So, in the end, you are updating your model using gradient descent and hence the name, gradient boosting. This is supported for both regression and classification problems. XGBoost specifically, implements this algorithm for decision tree boosting with an additional custom regularization term in the objective function."
그래디언트 부스팅은 예측 변수를 순차적으로 추가하고 이전 모델을 수정하는 앙상블 방법도 포함합니다. 그러나 매 반복 후에 분류 자에 다른 가중치를 할당하는 대신이 방법은 새 모델을 이전 예측의 새로운 잔차에 맞추고 최신 예측을 추가 할 때 손실을 최소화합니다. 결국, 그라디언트 하강을 사용하여 모델을 업데이트하므로 이름이 그라디언트 부스팅입니다. 회귀 및 분류 문제 모두에 대해 지원됩니다. XGBoost는 구체적으로 목적 함수에서 추가 사용자 정의 정규화 용어로 의사 결정 트리 강화를 위해이 알고리즘을 구현합니다.
4. XGBoost 하이퍼 파라미터
5. XGBoost python 코드
- 두가지 방법이 있음
5.1 파이썬 래퍼 XGBoostAPI
|
1
2
3
4
5
6
7
8
9
10
11
12
13
14
15
16
17
18
19
20
21
22
23
24
25
|
import xgboost as xgb
dtrain = xgb.DMatrix(data = X_train, label = y_train)
dtest = xgb.DMatrix(data = X_test, label = y_test)
params = {
'max_depth' : 3,
'eta' : 0.001,
'objective' : 'binary:logistic',
'eval_metric' : 'logloss',
'early_stoppings' : 100
}
num_rounds = 400
wlist = [(dtrain, 'train'), (dtest,'eval')]
xgb_model = xgb.train(params = params, dtrain = dtrain, num_boost_round= num_rounds, evals = wlist)
pred_probs = xgb_model.predict(dtest)
print("predict() 수행 결과값을 10개만 표시, 예측 확률값으로 표시됨")
print(np.round(pred_probs[:10],3))
preds = [1 if x >0.5 else 0 for x in pred_probs]
print("예측값 10개만 표시 : ", pred[:10])
get_clf_eval(y_test,preds)
|
cs |
- params(dict) : 부스터 파라미터
- dtrain(DMatrix) : 학습데이터
- num_boost_round(int) : 부스 반복 횟수
- n_fold (int) : CV 폴드 개수
- stratified(bool) : CV 수행시 층화 표본 추출(Stratified sampling) 수행여부
- metrics (string or list of strings) : CV 수행시 모니터링할 성능평가지표
- early_stopping_rounds(int) : 조기 중단을 활성화시킴, 반복횟수지정
5.2 사이킷런 XGBoost 개요
- XGBoost 개발 그룹은 사이킷런의 프레임 워크와 연동하기 위해 사이킷런 전용의 XGBoost 래퍼 클래스 개발
- 사이킷런의 기본 Estimator를 그대로 상속해 만들었기 때문에 다른 Estimator와 동일하게 fit()와 predict()만으로 학습과 예측이 가능하고, GridSearchCV, Pipleline 등 사이킷런의 다른 유틸리티 그대로 사용 가능
- 사이킷런을 위한 래퍼 XGBoost는 크게 분류를 위한 래퍼 클래스인 XGBClassifier, 회귀를 위한 래퍼 클래스인 XGBRegressor
|
1
2
3
4
5
6
7
8
9
10
11
12
|
from xgboost import XGBClassifier
xgb_wrapper = XGBClassifier(n_estimators = 400, learning_rate = 0.1, max_depth = 3)
xgb_wrapper.fit(X_train,y_train)
w_preds = xgb_wrapper.predict(X_test)
get_clf_eval(y_test,w_preds)
from xgboost import plot_importance
import matplotlib.pyplot as plt
fix,ax = plt.sublots(figsize = (10,12))
plot_importance(xgb_wrapper, ax = ax)
plt.show()
|
cs |

cf) def get_clf_eval 함수
|
1
2
3
4
5
6
7
8
9
10
11
12
|
def get_clf_eval(y_test,pred):
confusion = confusion_matrix(y_test,pred)
accuracy = accuracy_score(y_test,pred)
precision = precision_score(y_test,pred)
recall = recall_score(y_test,pred)
f1 = f1_score(y_test, pred)
roc_score = roc_auc_score(y_test,pred)
print("오차행렬")
print(confusion)
print('정확도 : {0:.4f}, 정밀도 : {1:.4f}, 재현율 : {2:.4f}, F1 : {3:.4f}, ROC AUC 값 {4:.4f}: '.format(accuracy, precision, recall, f1, roc_score))
|
cs |
<출처>
1. 파이썬 머신러닝 완벽 가이드
'인공지능 > 머신러닝' 카테고리의 다른 글
| [ML Algorithm] 머신러닝(Machine Learning) 기본 이론 (0) | 2019.10.16 |
|---|---|
| 머신러닝 알고리즘 - 서포트 벡터 머신(Support Vector Machines) (0) | 2019.10.16 |
| [ML Algorithm] Gradient Boosting Machine (0) | 2019.10.15 |
| [ML Algorithm] 랜덤포레스트(Random Forest) (1) | 2019.10.15 |
| [ML Algorithm] 결정트리모델(Decision Tree Model) (0) | 2019.10.15 |